Thursday, January 27, 2011

Death by Bacon


Bacon. The most glorious of foods. The meaning of life to many of us. Kryptonite to a healthy heart and enemy to thighs all over the world. Bacon. Food of love.

Naturally...one should make a dinner that involves TWO dishes with bacon. Sure, not an every day meal, but a tasty one to be had maybe once a month. My friends, I shall share with you the recipe for my "Death by Bacon" dinner.

Yari's Rice

Ingredients:

2 cups of white rice, cooked in chicken broth...not water
1 tbsp of olive oil
1 stick of butter (cut into 4-5 pieces)
1 cup of bacon bits
1/2 white onion, finely chopped
1/2 green bell pepper, finely chopped
Parmesan cheese, grated

Directions:

1. In a heavy skillet or medium saucepan, sautee the onion and bell pepper in the olive oil over medium-high heat for 3-4 minutes.

2. Add rice, bacon bits and butter. Continue stirring all ingredients together over medium heat until butter is melted and everything has been mixed together evenly.

3. Sprinkle with as much Parmesan cheese as you like. I tend to use about 3 tablespoons.

4. Stir and combine all ingredients one more time and let it sit in low heat for 5 minutes.

5. Serve and nom.

Provolone Stuffed Chicken Breasts, Wrapped In Bacon

Ingredients:


4 skinless, boneless chicken breasts
8 slices of bacon, uncooked
1/3 of a bell pepper, sliced julienne style
1/3 of a white onion, sliced julienne style
8 baby red potatoes, cut in quarters
4 slices of provolone cheese
Salt
Ground Black Pepper
Dried oregano
Adobo Goya (sort of a multi use seasoning blend, you may pick whichever seasoning blend you use for cooking chicken. Keep in mind to reduce the black pepper/salt if your blend already has it)
Olive oil
Toothpicks (optional)

Directions:

1. On a clean cutting board, use a knife to carefully butterfly fillet a chicken breast. It should almost look like an open book, leaving one edge still completely attached.

2. If the chicken breasts are thick, use a meat tenderizer to evenly flatten the chicken breast until it's approximately 1/2" thick in most parts. Don't beat it to a mushy pulp, please.

3. Season chicken breast on both sides with the adobo (seasoning mix), salt and pepper to taste. Also sprinkle lightly with dried oregano. Very lightly. Too much oregano will overpower all other tastes.

4. Cut the cheese slice in half and place inside the chicken breast, close the chicken breast, tucking in the extra 'flaps' of chicken to sort of make a sealed pocket for the cheese.

5. Carefully wrap the bacon slice around the chicken. Make it snug, to further prevent any leaks from inside the chicken breast. Use second slice, if needed, to cover any other part of the chicken breast that needs wrapping.

6. You can use the toothpicks to secure the bacon in place, or simply place the chicken breast in a glass baking pan.

7. Repeat the process for all chicken breasts. Place sliced onions, bell peppers and baby potatoes around chicken in baking pan and drizzle everything with olive oil. About 2 tbsp will do.

8. Cover baking pan loosely with aluminum foil, tenting it so the heat can run through but the dish still retains some moisture. Bake at 375F for about 45 minutes to an hour.

9. Stick a fork in the potatoes and chicken. If it slides in easily and comes out clean it is done. You can also carefully cut a part of the chicken and ensure it's cooked all the way through. Uncover it and bake for 5 more minutes so it's golden and the bacon can crisp.

10. Serve with rice and nom accordingly.

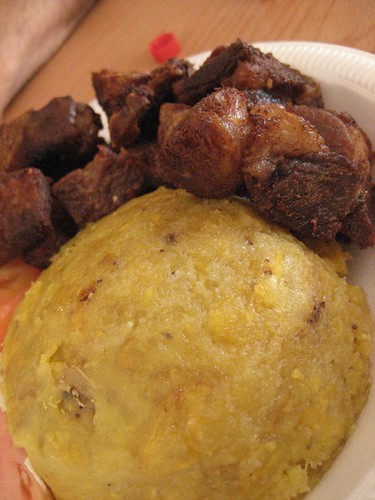
The picture above is my end result. I also fried me up some ripe plantains. The sweet of the plantain makes it an excellent side dish with the saltiness of bacon goodness.

Happy Nomming,

Pastrami Pants

Monday, January 17, 2011

Red Velvet Cupcakes


Red Velvet Goodness, People!

Ingredients:

2 1/2 cups of flour
1/2 cup of unsweetened cocoa powder
1 tsp of baking soda
1/2 tsp of salt
1 cup of butter, softened
2 cups of sugar
4 eggs
1 cup of sour cream
1/2 cup of milk
1 oz bottle of red food coloring
2 tsp of vanilla

Directions:

1. Preheat oven 350F. If you don't know how to do this, stop trying to bake and just go to the store and buy cupcakes.

2. Mix flour, cocoa, baking soda and salt in a medium bowl. Set aside.

3. Beat butter and sugar on medium speed for 5 minutes or until light and fluffy. Beat in one egg at a time.

4. Mix in sour cream, milk, coloring and vanilla. Gradually beat in flour on low speed. DO NOT OVERBEAT.

5. Bake 20-25 minutes.


"When you look at a cupcake, you've got to smile." ~ Anne Byrn

Friday, November 19, 2010

Pilón


Hello Nom Folk,

Today I'd like to take a few minutes and type up a note to introduce you to one of my favorite instruments to use in my kitchen when it's cooking time. That picture above, is my very own, very old, ever-faithful Pilón (Pee-lohn).

Who would've thought that a primitive mechanism such as putting something between two rocks and using the friction between them to grind it, would develop into multiple uses in all cultures. It is used in a variety of materials, from ceramics and marble for pharmaceutical and botanical means...to the molcajete made out of stone, which is used widely in Mexico to grind down corn, make guacamole and salsas.

The "El Pilón y la maceta", or what is a Puerto Rican's version of a mortar and pestle, is made of solid wood and comes in a variety of sizes. It is the staple of our Caribbean cuisine and is almost considered a rite of passage for cooks to prove themselves masters of the kitchen. Ideally, one receives a pilón as a hand me down from our expert grandmother cooks or as a very appropriate wedding gift, signifying that it is now your turn to carry the torch when it comes to feeding your own family. Time to put your skills to use and break in that brand new pilón, ensuring it looks worn out and it carries battle scars of it's own. Stories to share with your own offspring as you show them how to properly machacar or grind down your ingredients.

As far as the pilón's beginnings in Puerto Rico, there are several accounts from Spanish soldiers dictating that upon arriving on our island, they witnessed devices similar to our pilones being used by the native indians (Taínos) to mash foods down to a pulp or fine powder. As time went by, bigger pilones emerged in the island's coffee plantations, which were used to process the dried coffee beans and grind them for distribution. Below is an image of two hacienda (coffee plantation) workers, using giant pilones to grind coffee beans - circa 1916:

Traditionally, my great grandmother did not only show me how to grind coffee beans from her back yard into a small pilón before brewing, but it is in this bowl that we also learned to make the base garlic paste which we use to season our meats, poultry, fish and veggies. It might not sound like a great deal, but trust me, your skill is demonstrated by being able to puree several cloves with a touch of olive oil and spices - without any cloves bouncing out as you slam down the maceta full force in small circles and all the bits perfectly turned into mush, with no lumps. Try it, then get back to me. That mixture is then either rubbed on your choice of meat or throw on a skillet in preparation of other foods. The holy base of cooking.

Not to forget, the pilón is also the home where one puts in one of our ultimate traditional dishes. The mofongo. The mofongo comes to life when you grab green plantains, cut them in small pieces and fry them in oil until golden and cooked thoroughly. Once cooked you put the pieces in the pilón with bits of bacon, fresh chicharrón (pork grinds, yes we make our own) and a touch of the garlic paste. Start mashing it, creating sort of a mashed potato out of the plantains. Once it is all mashed, you can ball it up and serve in the pilón with a bowl of your favorite broth next to it...or to really kick it up a notch, fill up the mofongo with fried pork bits, chicken or seafood. The mofongo tastes just like garlic mashed potatoes, a bit starchier. It is what you fill it with or serve it with that will compliment the taste and really bring out the simplicity of the dish.

This is what a Mofongo Relleno (stuffed with meat) looks like:


And this is what the traditional mofongo looks like, almost like a dome created by the inside of the pilón, served with broth and choice of meat as a side:


Ahhh...Now I feel better.

You see I'lll be using some ingredients and mixed bases for the recipes I post here that are created by using my pilón. Can you use any kind of mortar and pestle? Yes. Of course. The results will be pretty similar. But for my mofongo recipe? Man, oh man, do I recommend you investing a few dollars on a pilón.

My pilón belonged to my grandmother, then my mother and now, 30 years later, to me. As you can see by the picture it has been through it all, including moving to a new country. It's my reminder of family, home and timeless food.

P.S. Mom and I have discovered the pilón is an excellent tool to crack walnuts and pecans. Improvise, people, improvise.

Happy Nomming,

Pastrami Pants

Thursday, November 18, 2010

Tex-Rican Tostadas


I'm pretty much convinced there isn't a country in existence that has not heard and fell in love with Mexican food. Why would my household be any exception? It's tasty, accessible (considering my current residence - West Texas) and overall simple to prepare.

Tonight, after a long day of work, I came home and prepared a decent "Mexican" dinner. Ok, ok...so if you're an actual Mexican you might not consider this authentic. But, is this NOT the whole purpose of my food explorations? To adapt it in a way that honors the original creation but puts a nice spin to it?

Ingredients:

For Beef:

1 lb of ground beef (Preferably higher than 80/20)
1 clove of garlic, ground
1/3 cup of diced onion (very small pieces)
1/3 cup of diced bell peppers
1/2 tsp of ground, dried oregano leaves
1 tsp of apple cider vinegar
2 tbsp of olive oil
1/2 tsp of ground cumin
Goya Adobo (seasoning) to taste
Salt and Pepper to taste

Other toppings:

1 sm avocado, mashed and seasoned with salt and/or lemon juice to taste
1 small bag of finely shredded cheddar cheese
1 can of cooked, seasoned black beans
1 cup of sour cream
1 small tomato, diced
Half a head of lettuce, finely shredded

1 Bag of Tostada shells (I use Mission brand)

The Process:

1. In a medium bowl, break apart your ground beef and add the following ingredients: Goya Adobo, vinegar, cumin, oregano, salt and pepper. Mix thoroughly (I use my CLEAN hands to make sure it's all blended) until all the ingredients are a part of most of the ground beef mix.

2. In a medium saucepan, simmer the onion, bell peppers and garlic in the oil for about 5 minutes on high heat. Stir continuously, as you only want the veggies to release their flavor, not burn.

3. Place the ground beef in the saucepan, on medium heat for 15 minutes until the meat is browned and thoroughly cooked. Continue to break all clusters of beef apart and stir every few minutes to ensure no area is left raw.

4. While meat is cooking, heat up your cooked black beans, seasoning to taste and draining any excess water once they're hot and ready to serve.

5. Once meat is cooked, remove from heat and drain any excess fluid/fat that may be left in the pan.

That's it!

Place all ingredients in different, smaller serving bowls. Lay them out "buffet" style.

To prepare a tostada, simply visualize it as a flat taco. Pile on the ingredients however you desire, leaving some out or maybe doing extra layers.

Warning: These may be messy eating...but oh, so worth it.

Actual Prep Time: 25 minutes

P.S. I omitted any spicy ingredients on purpose, making this dish "Puerto Rican Friendly". We don't eat any sort of spicy food. If you feel the need to add a little heat, I recommend dicing one fresh, seeded jalapeno pepper and cooking it in the saucepan with the onion, garlic, bell pepper in olive oil.

Happy Nomming,

Pastrami Pants


In the Beginning...

(My first memory of traveling and good finds. I didn't go to Disney for the rides. No. I went for the Mickey Mouse ice cream bars. Good deal for the price. Feast for the eyes, tummy and the child in all of us.)

In the beginning, God created stuff. Edible things that grew on trees and in the ground and a pretty neat rock called Earth, which could be explored far and wide in search for new horizons.

Or...

If you don't believe in a god or creation...There was a bunch of junk floating in space, and one day there was this giant explosion that resulted in a the birth of a rock called Earth, which was vast and full of surprises. A rock that eventually grew things on it, things for animals and people to eat.

Either way, here we are today. Ages later, but still walking this earth in search of two things: food and a place comfortable enough to stay a while. We still find new flavors in timeless foods and new ways to incorporate ingredients used by our ancestors. We live in places that might be world known for landmarks, yet we are always in the hunt for undiscovered treasures in our surroundings. Secret places only the locals enjoy and brag about to visitors who would've otherwise turned up their nose at.

I invite you to come in, stay for a while. I have a knack for finding new ways to become closer to my readers and Twitter followers. You can come with me on my quest for new ideas and secrets found in existing recipes, bars, beaten paths and old roads...

There's always more than one set of eyes looking at something. You never know what you'll find.

Regards,

Pastrami Pants